
A Guide to Governance Voting Using Celo Terminal
May 24 2024
by Victoria Calmon
This tutorial provides a step-by-step guide on how to use Celo Terminal for governance voting on the Celo blockchain. It covers downloading and installing Celo Terminal, setting up an account, preparing for governance voting by adding the CeloVote app and $CELO tokens, locking $CELO tokens, and finally participating in governance voting. The tutorial concludes by encouraging readers to share the tutorial and start voting.
Welcome to this tutorial on governance voting using Celo Terminal! I'm Schmonzy, and today I'll walk you through the steps to download, install, and use Celo Terminal for participating in governance voting on the Celo blockchain.
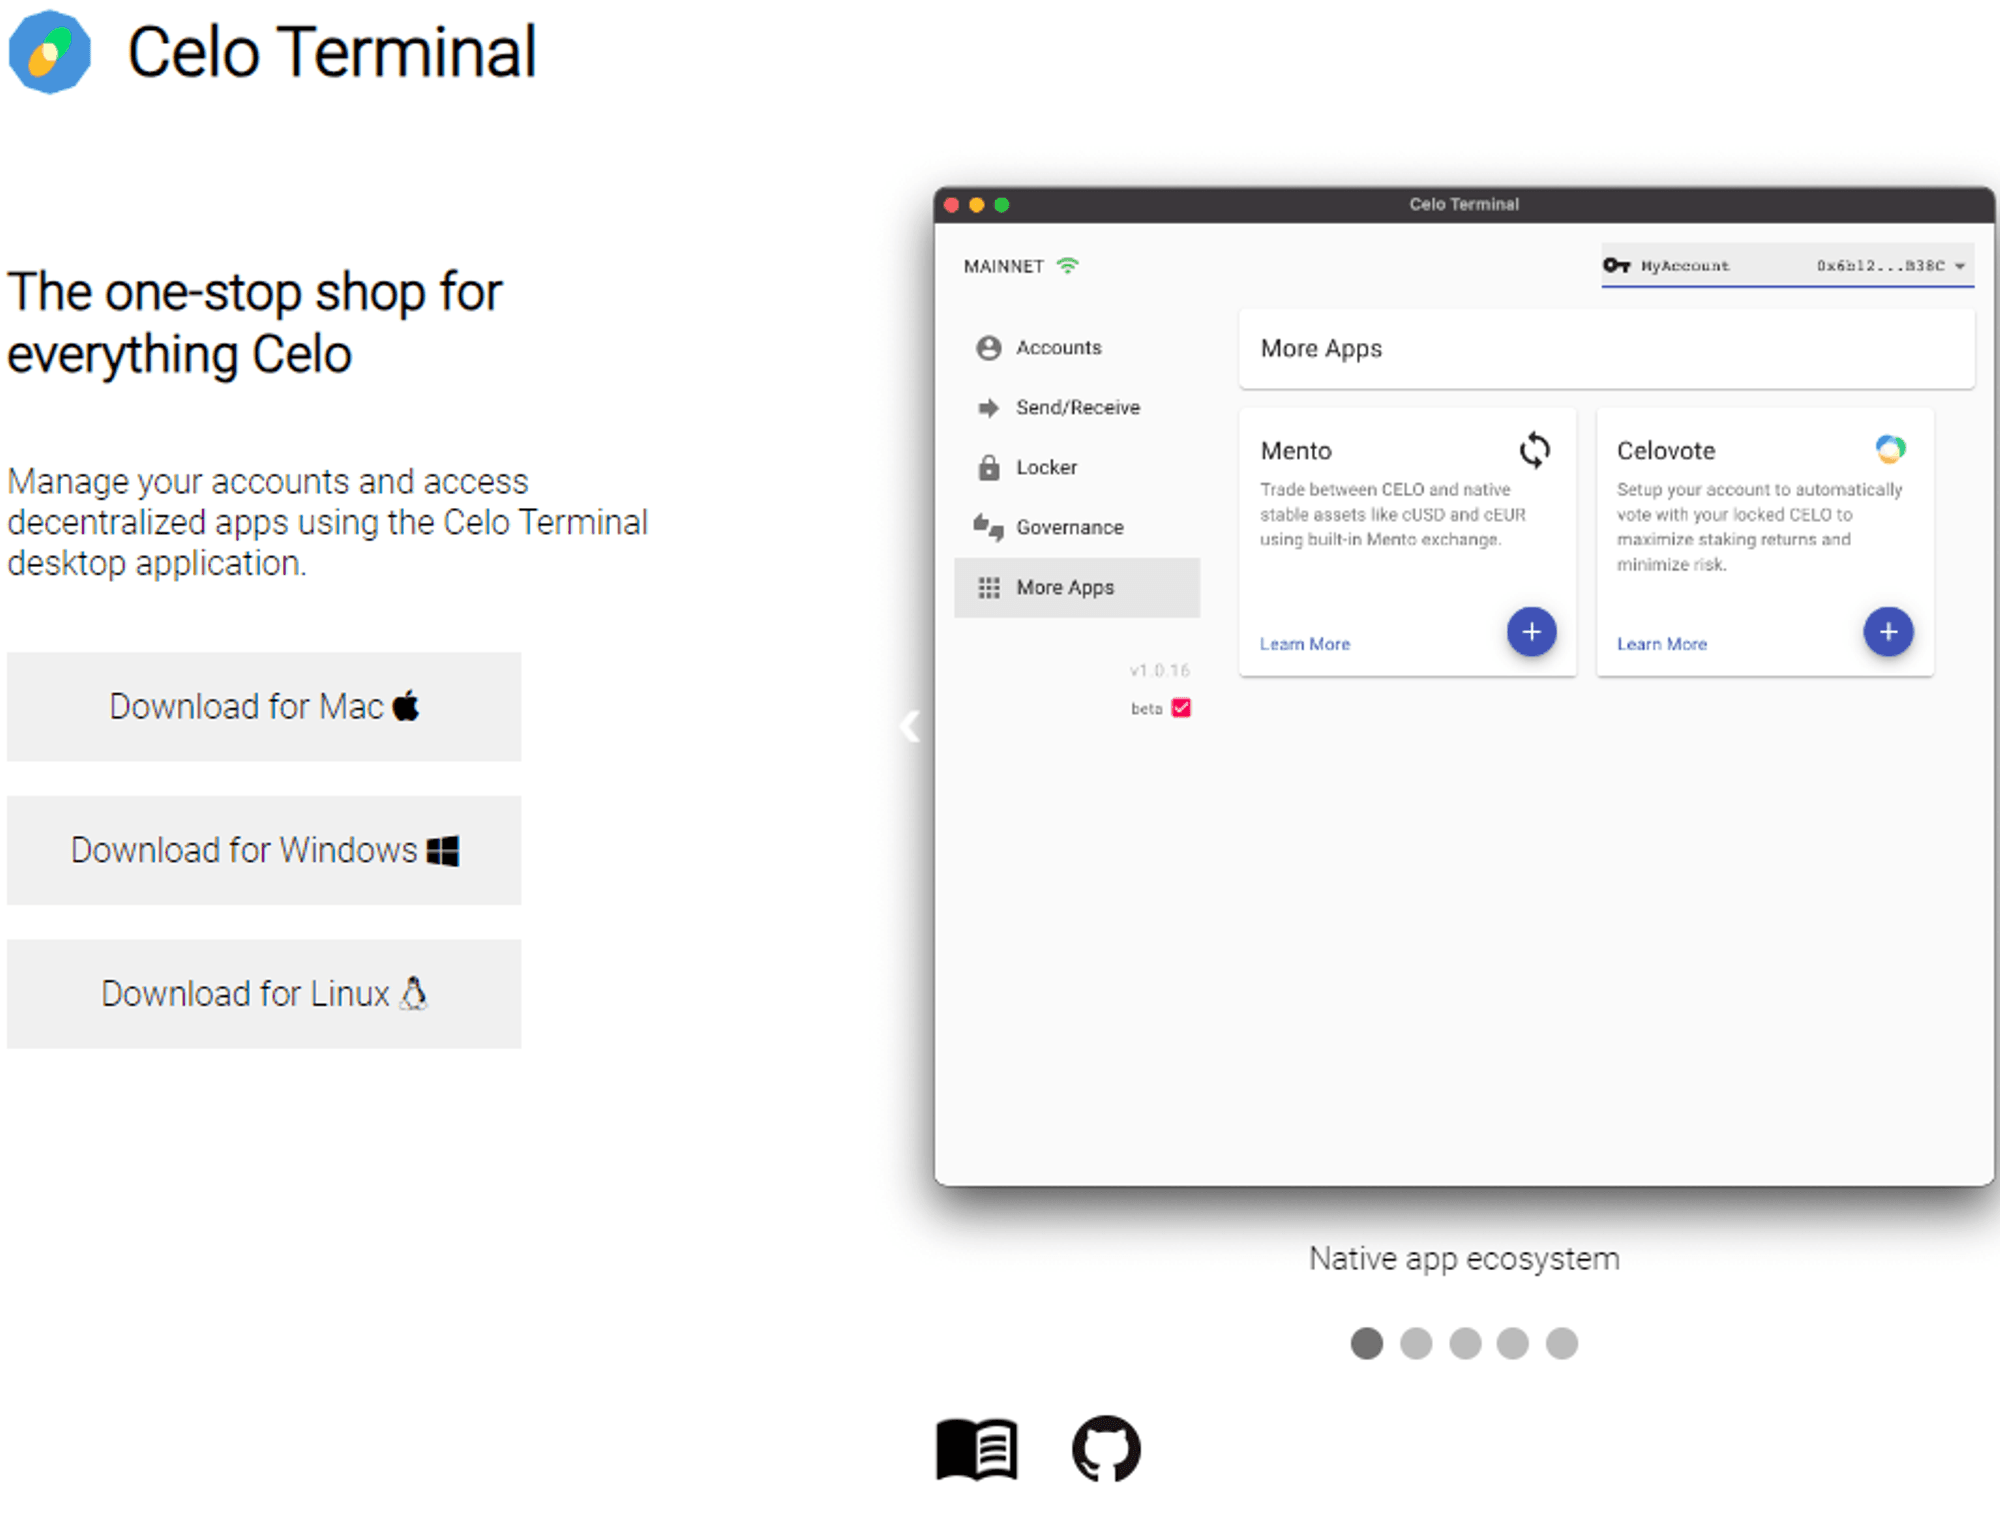
Step 1: Download and Install Celo Terminal
First things first, let's download Celo Terminal from celoterminal.com Once the download is complete, install it on your desktop.
Installation for Mac Users
For Mac users, follow these additional steps to install Celo Terminal:
Download the DMG File: Visit https://github.com/zviadm/celoterminal/releases/download/v2.0.4/Celo-Terminal-2.0.4-mac-arm64.dmg and download the Celo Terminal DMG file.
Open the DMG File: Once the download is complete, double-click the DMG file to open it.
Drag to Applications: Drag the Celo Terminal icon into your Applications folder.
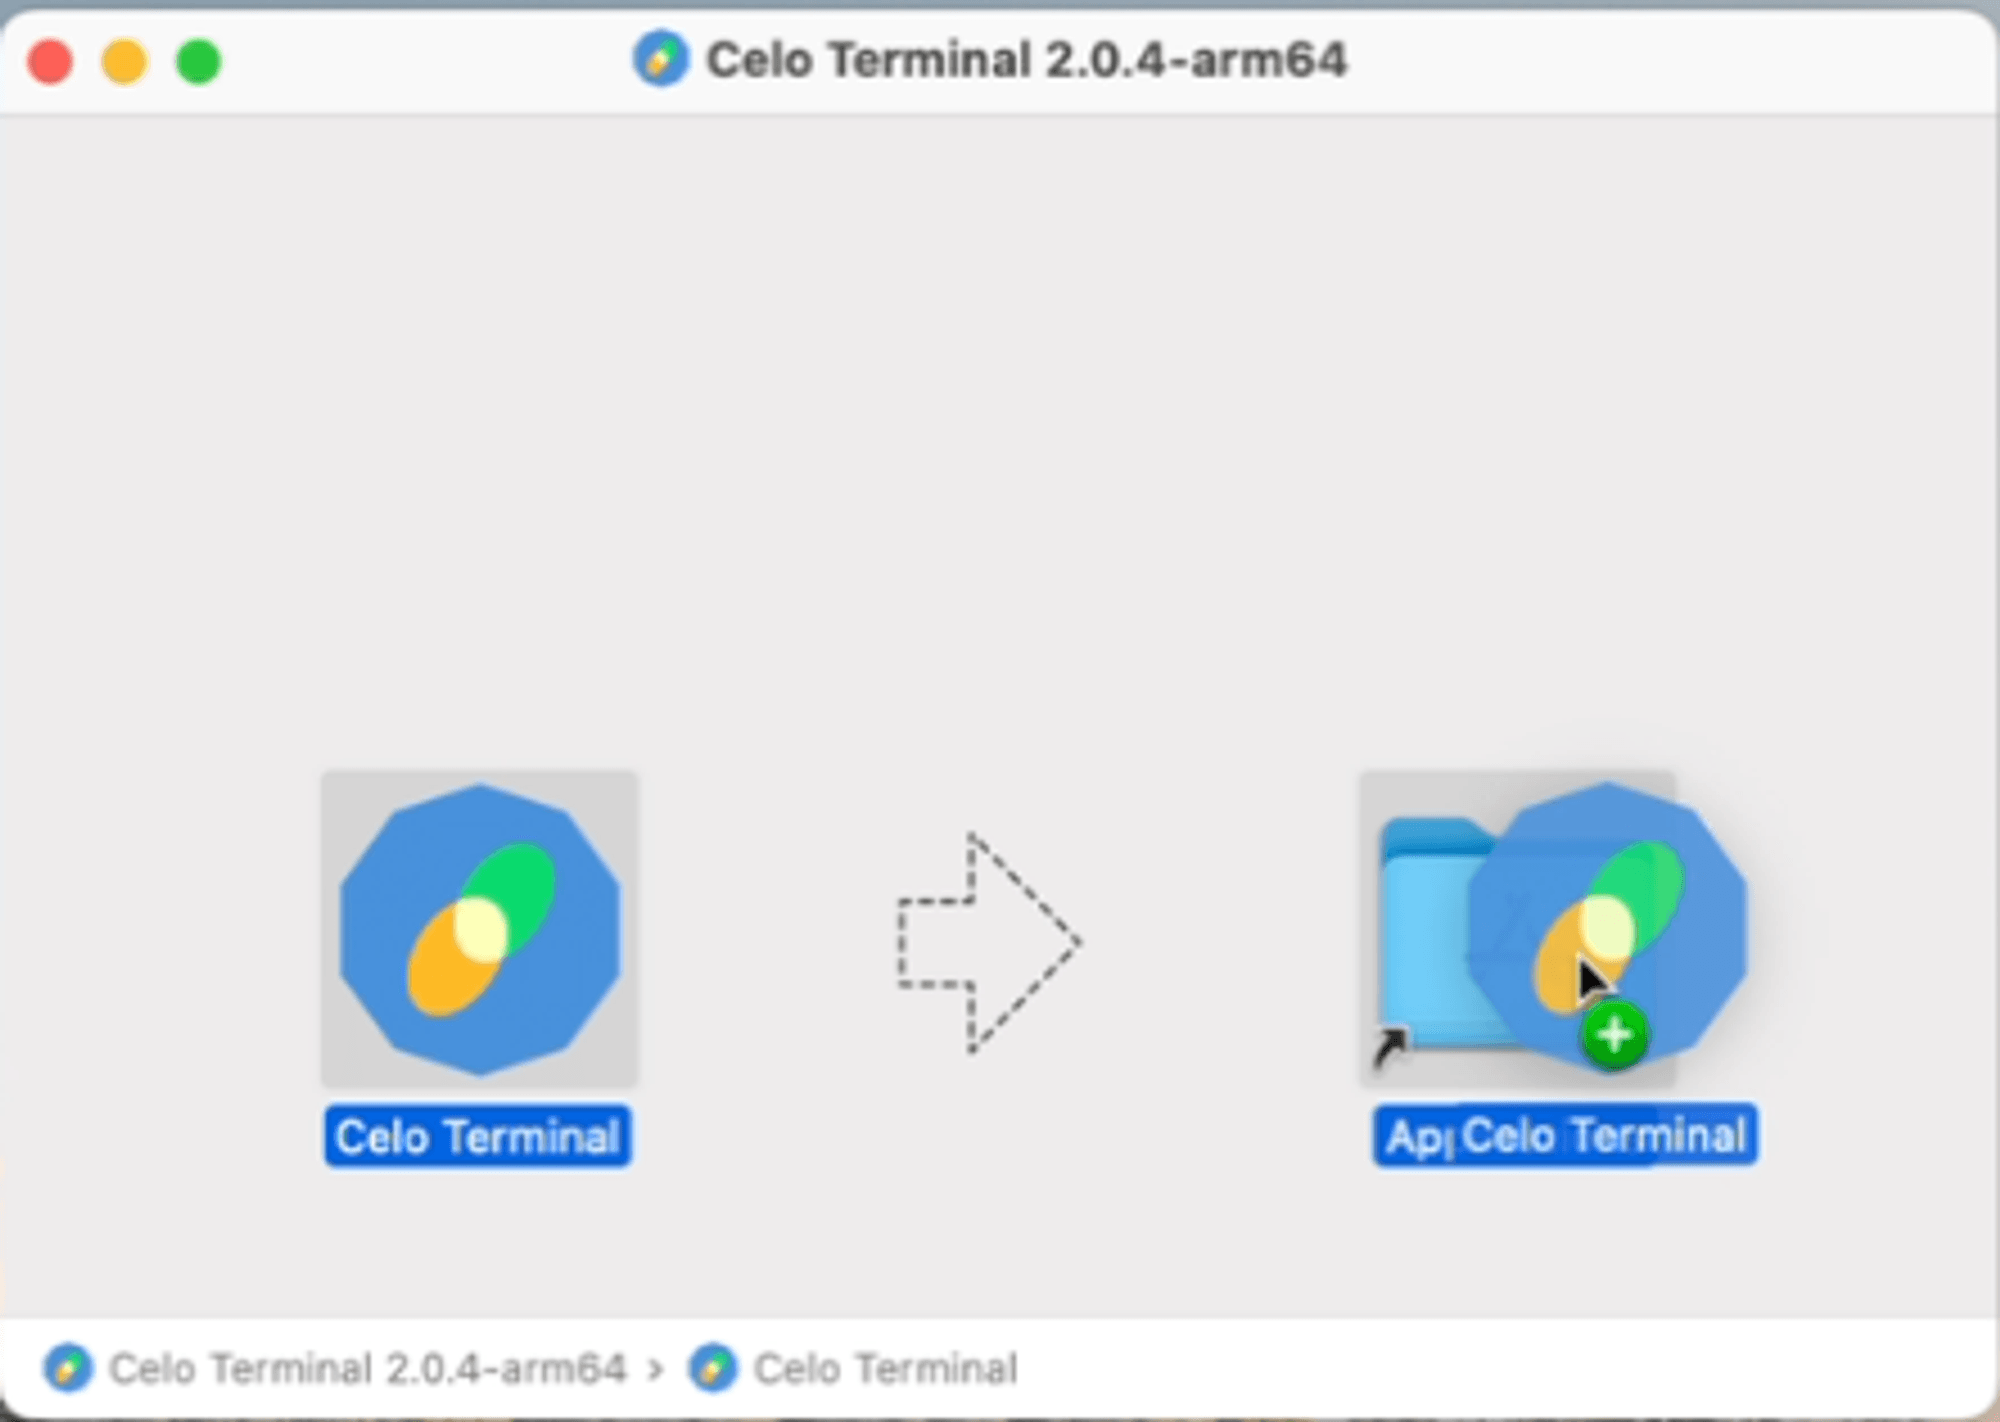
Open Celo Terminal: Navigate to your Applications folder and double-click Celo Terminal to open it. If you encounter a security warning, go to System Preferences > Security & Privacy > General and click Open Anyway.

Step 2: Setting Up Your Account
Create a Local Password
In the account section, click on Setup Password.

This will create a local password that you will use for any actions within Celo Terminal.
Add an Account
You have several options here: you can create a local account, import an existing one, or add a Ledger account.
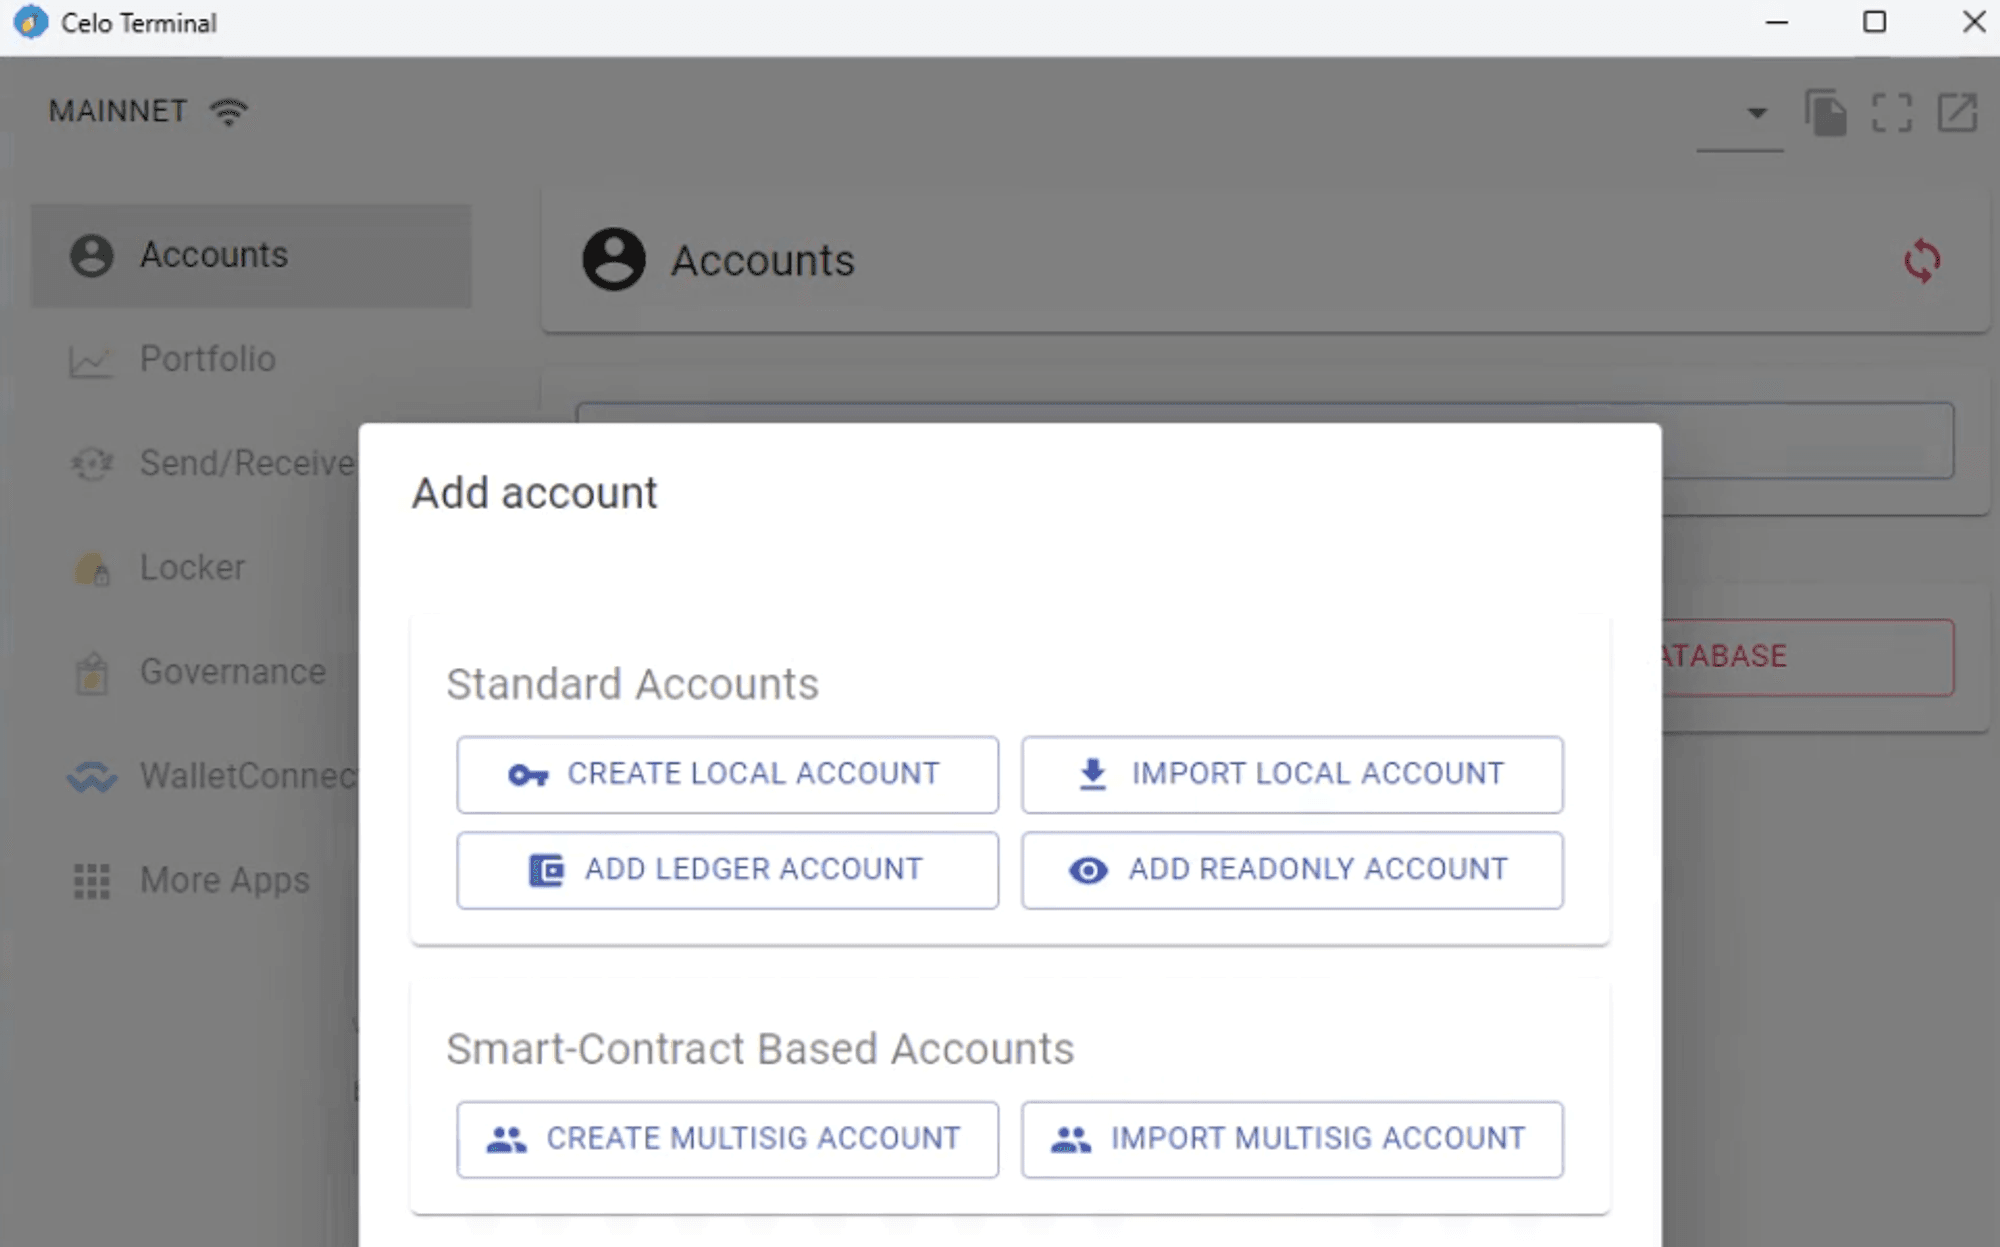
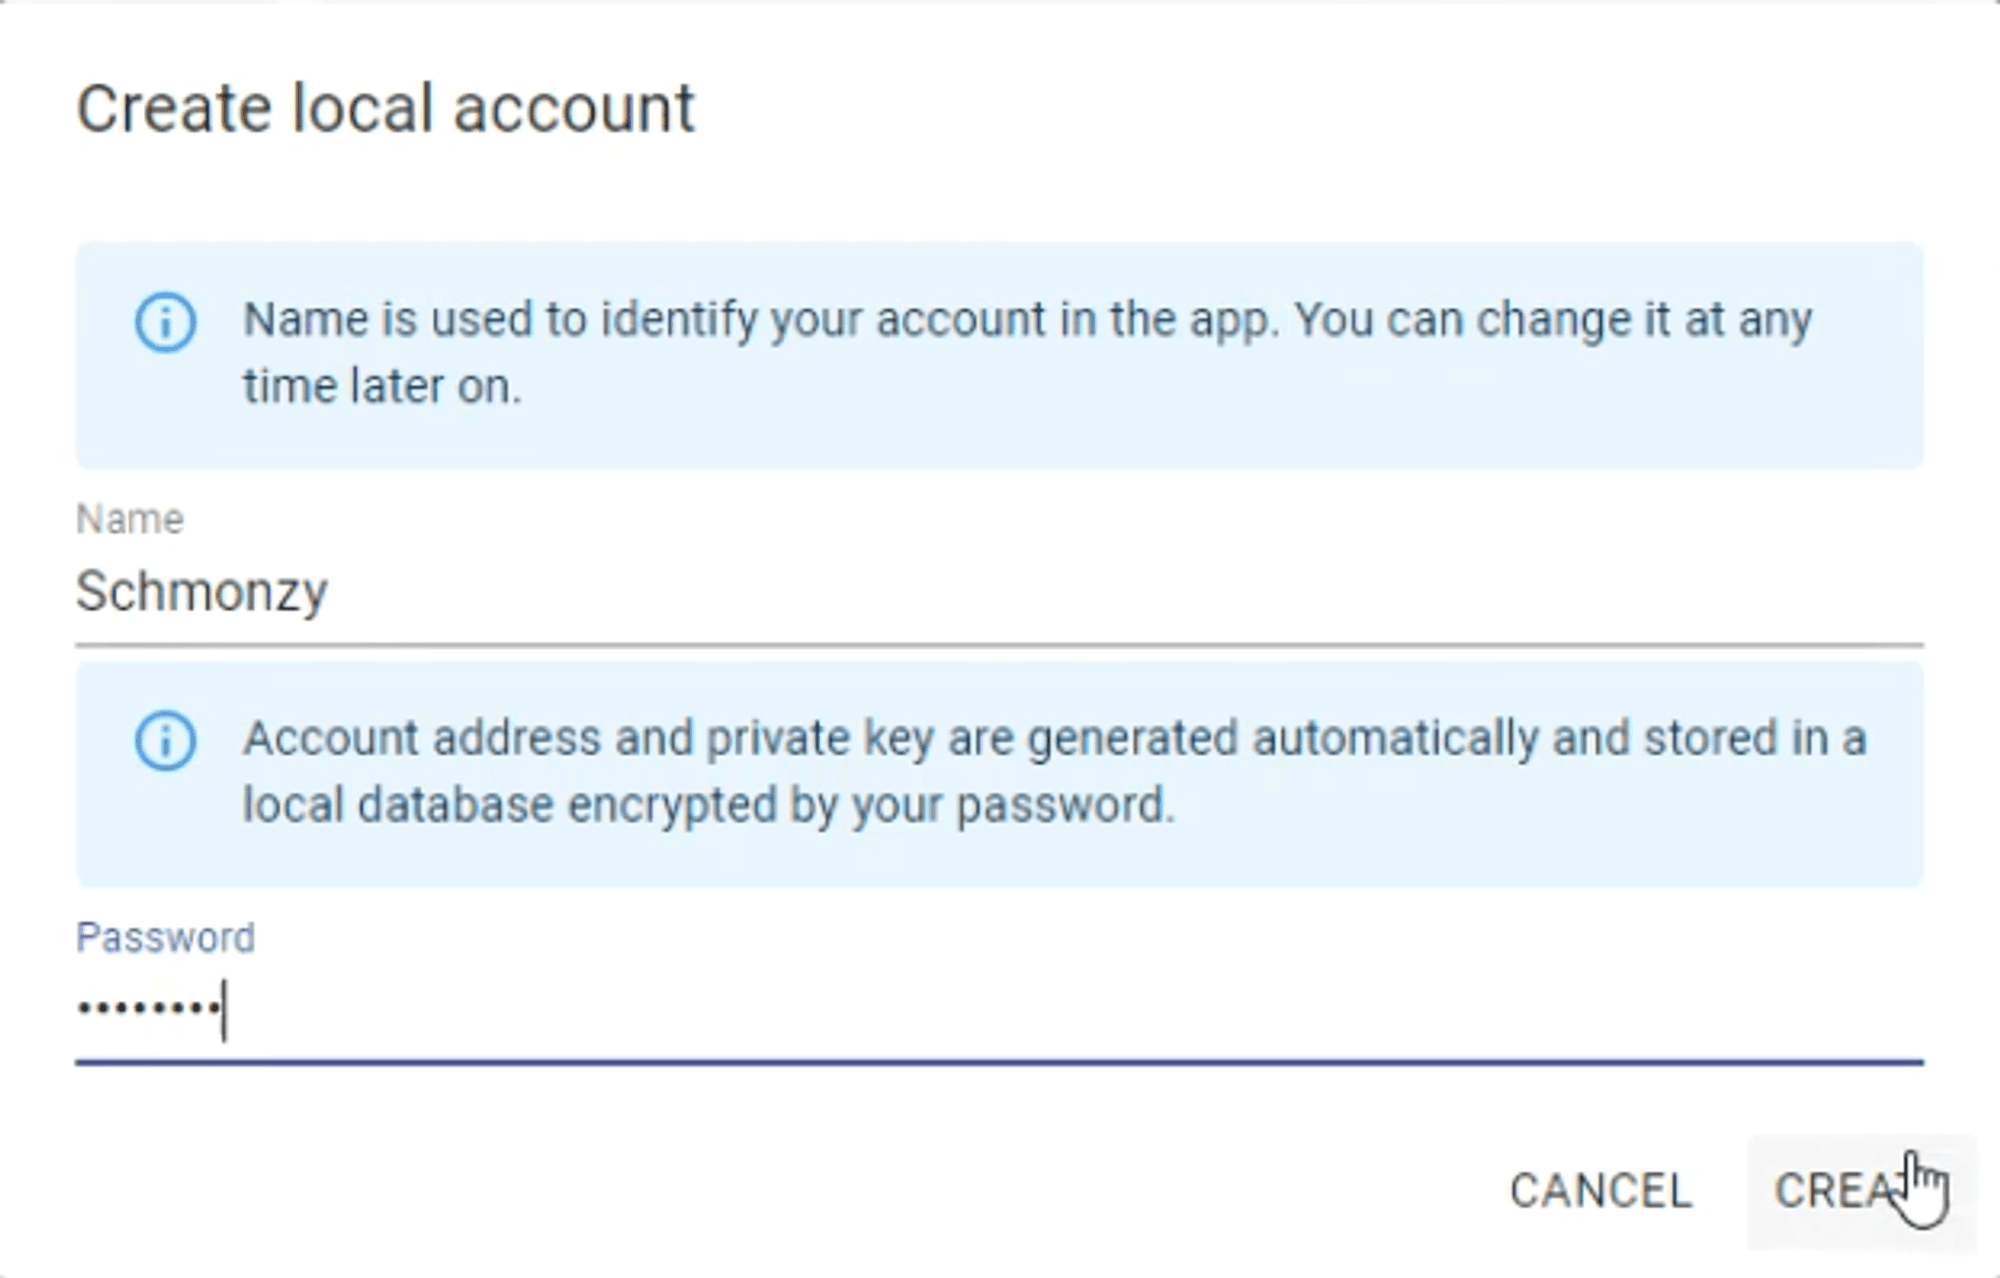
For this tutorial, we’ll create a local account as it's the easiest method.
Enter a name for the account, for example, "Schmonzy"
Enter the same password that we set up earlier.
Click Create.
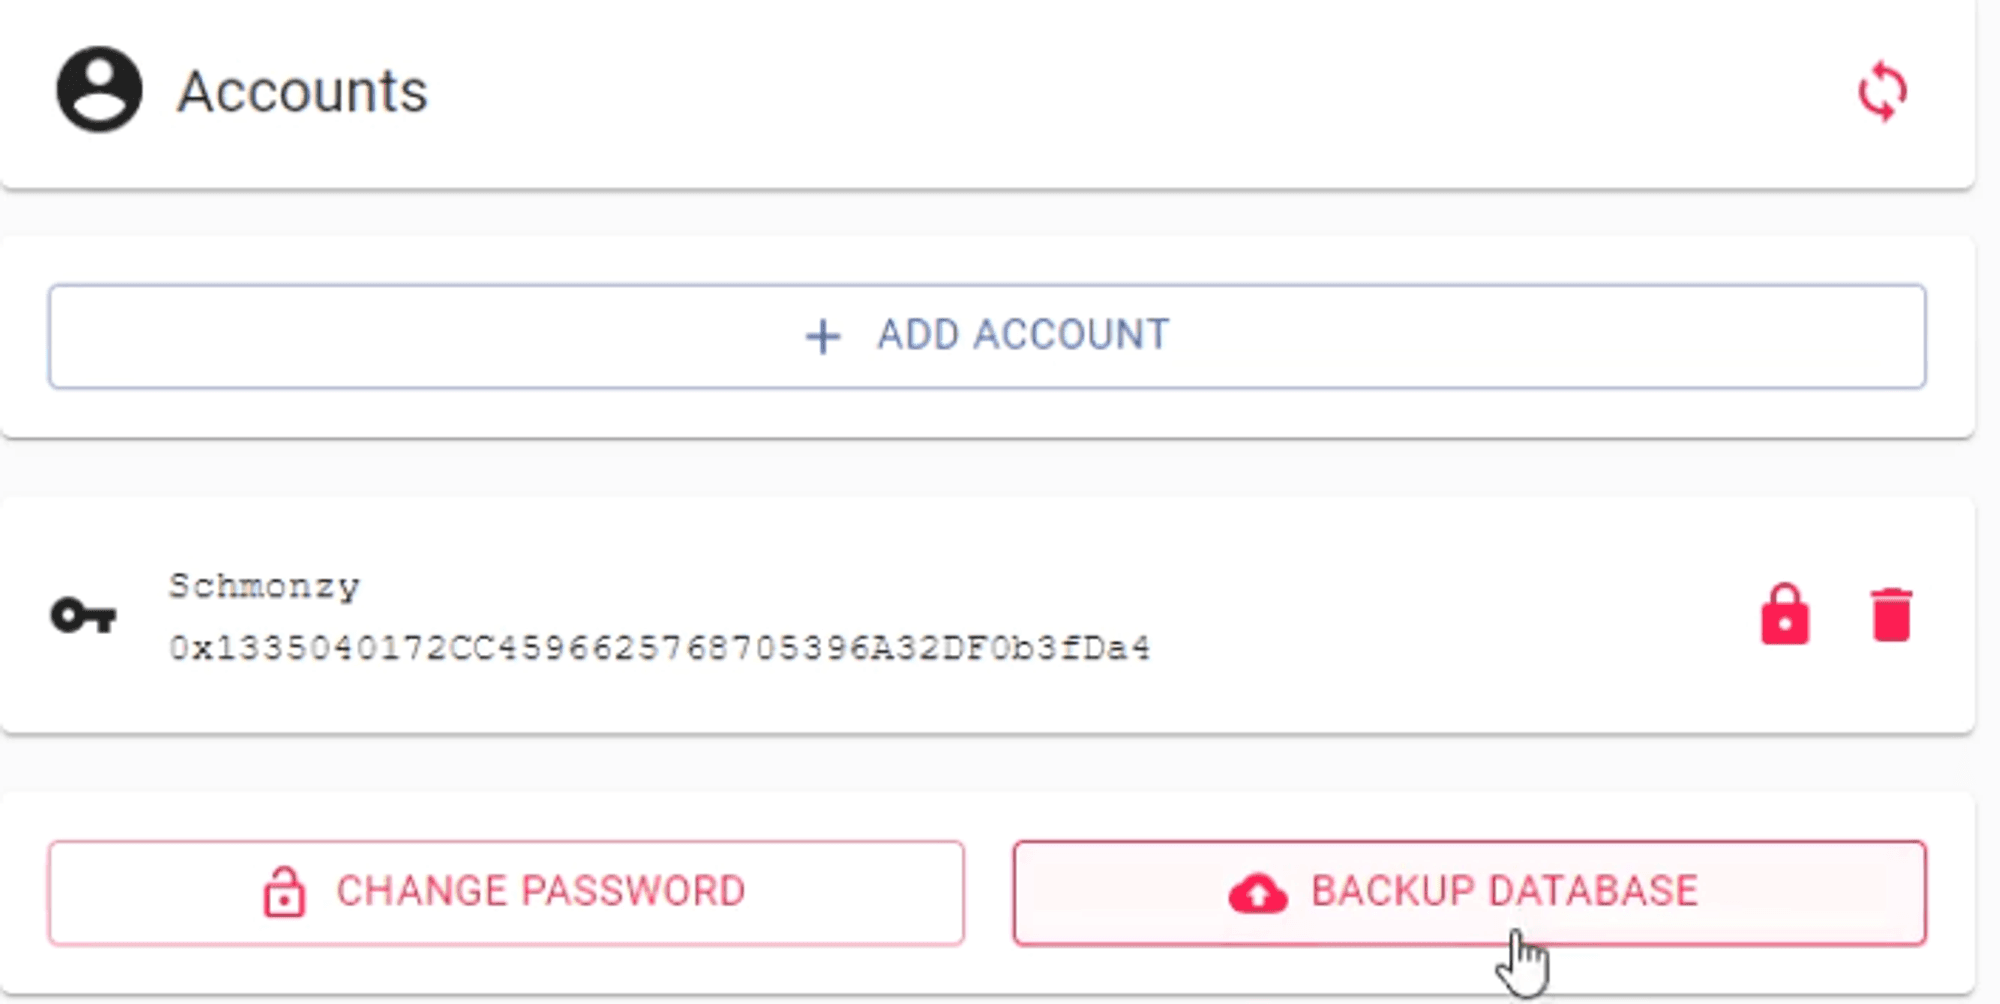
Your local account is now created. To ensure it's safely stored, click Backup Database to save it in the Celo Terminal folder.
Step 3: Preparing for Governance Voting
Add the CeloVote App
Go to the More Apps section and click on it. Add the $CELO Vote app by clicking on the plus button.
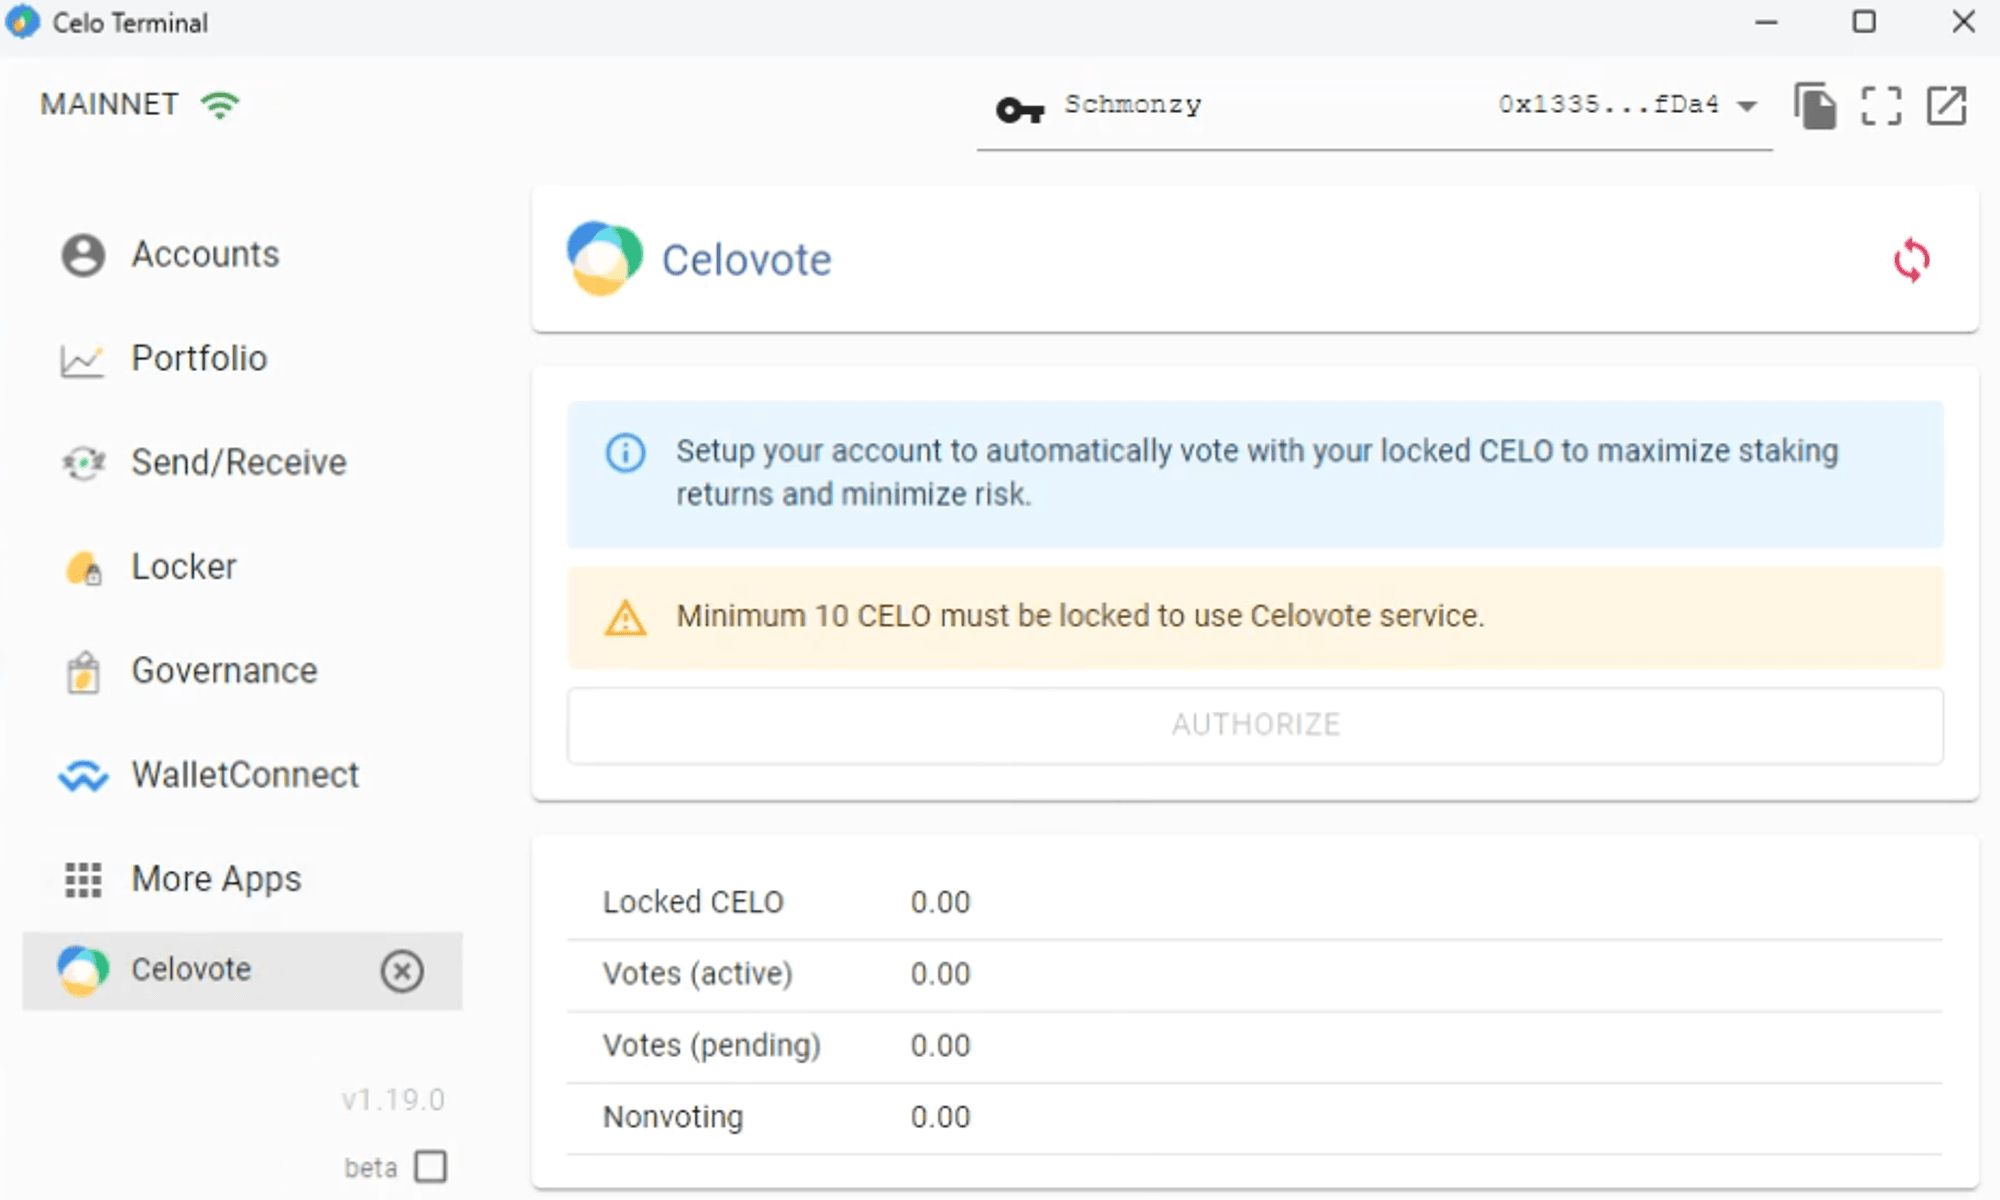
The app indicates that a minimum of 10 $CELO must be locked to use the CeloVote service, and our locked value is currently zero.
Add $CELO Tokens
To proceed, add some $CELO tokens. Ideally, you should add 11 $CELO to keep one $CELO for confirming transactions.
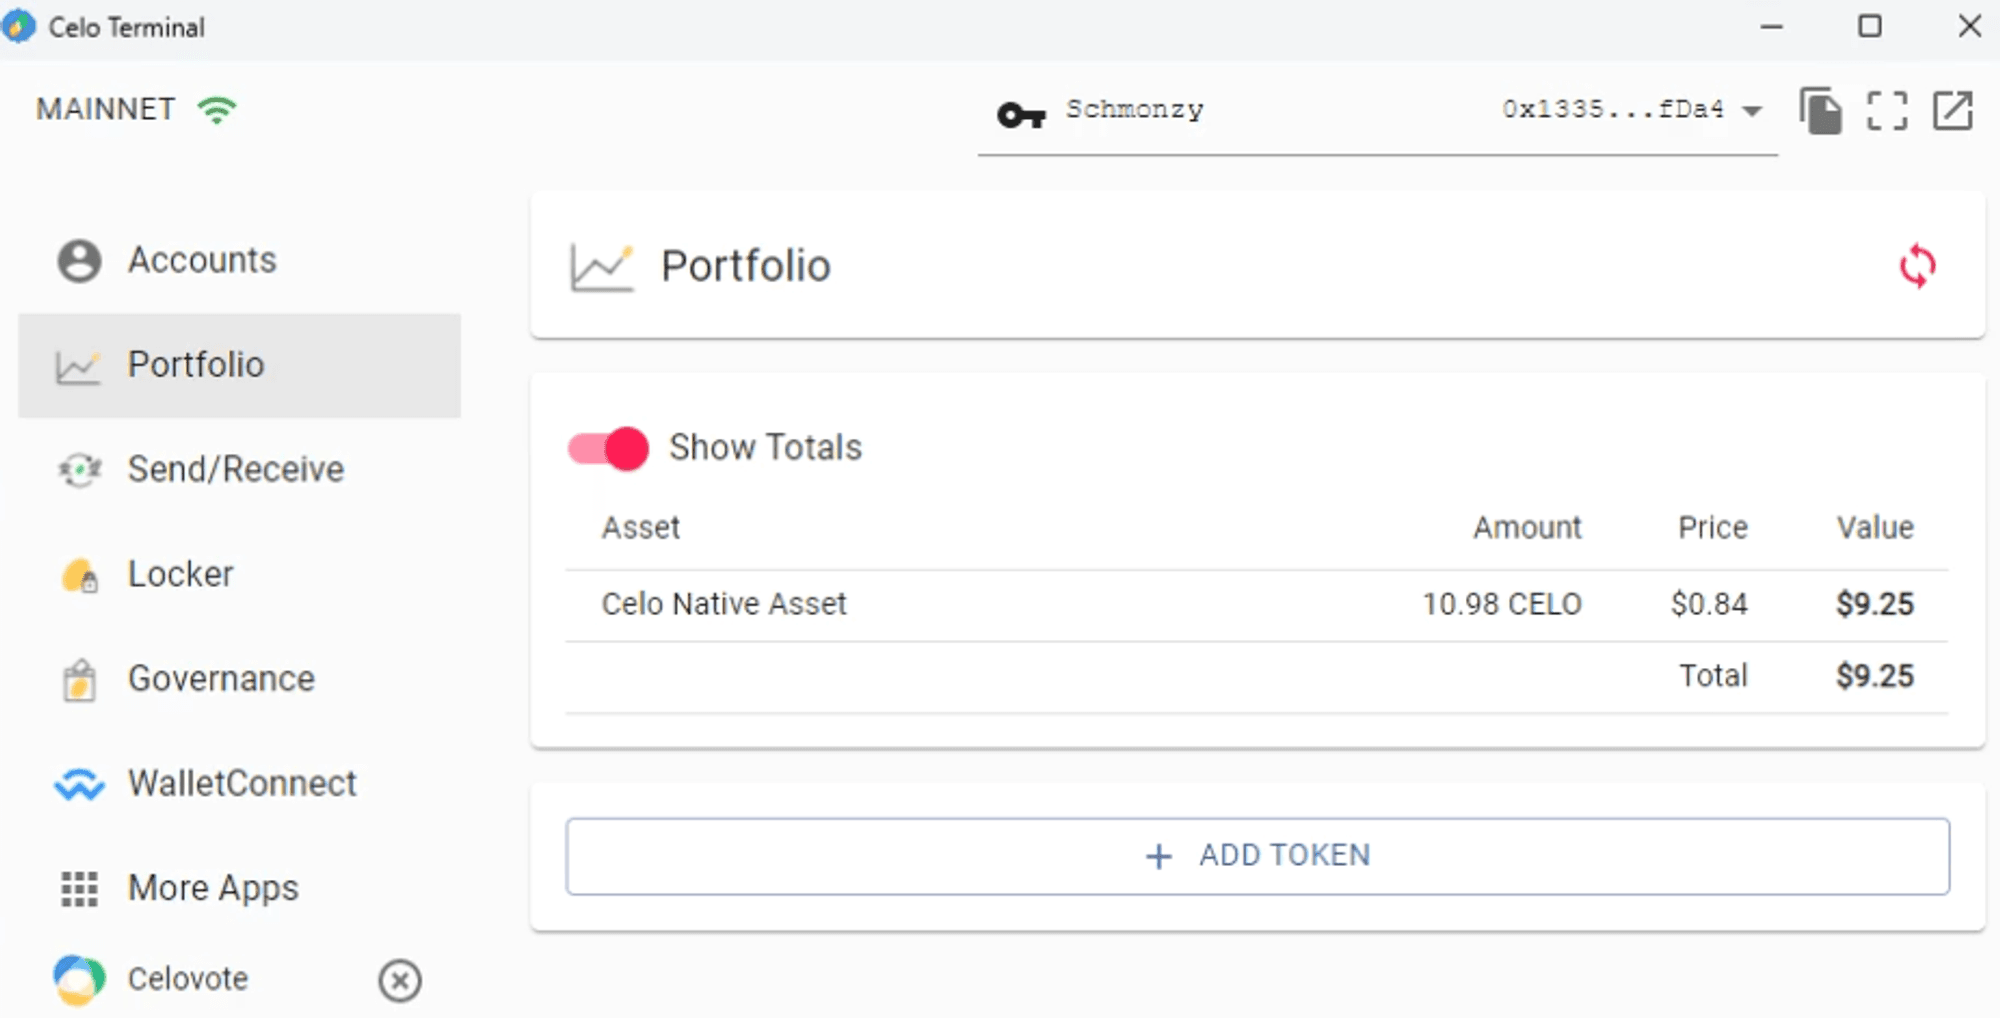
Once the funds arrive, you will be able to see them in the Portfolio section.
Step 4: Locking $CELO Tokens
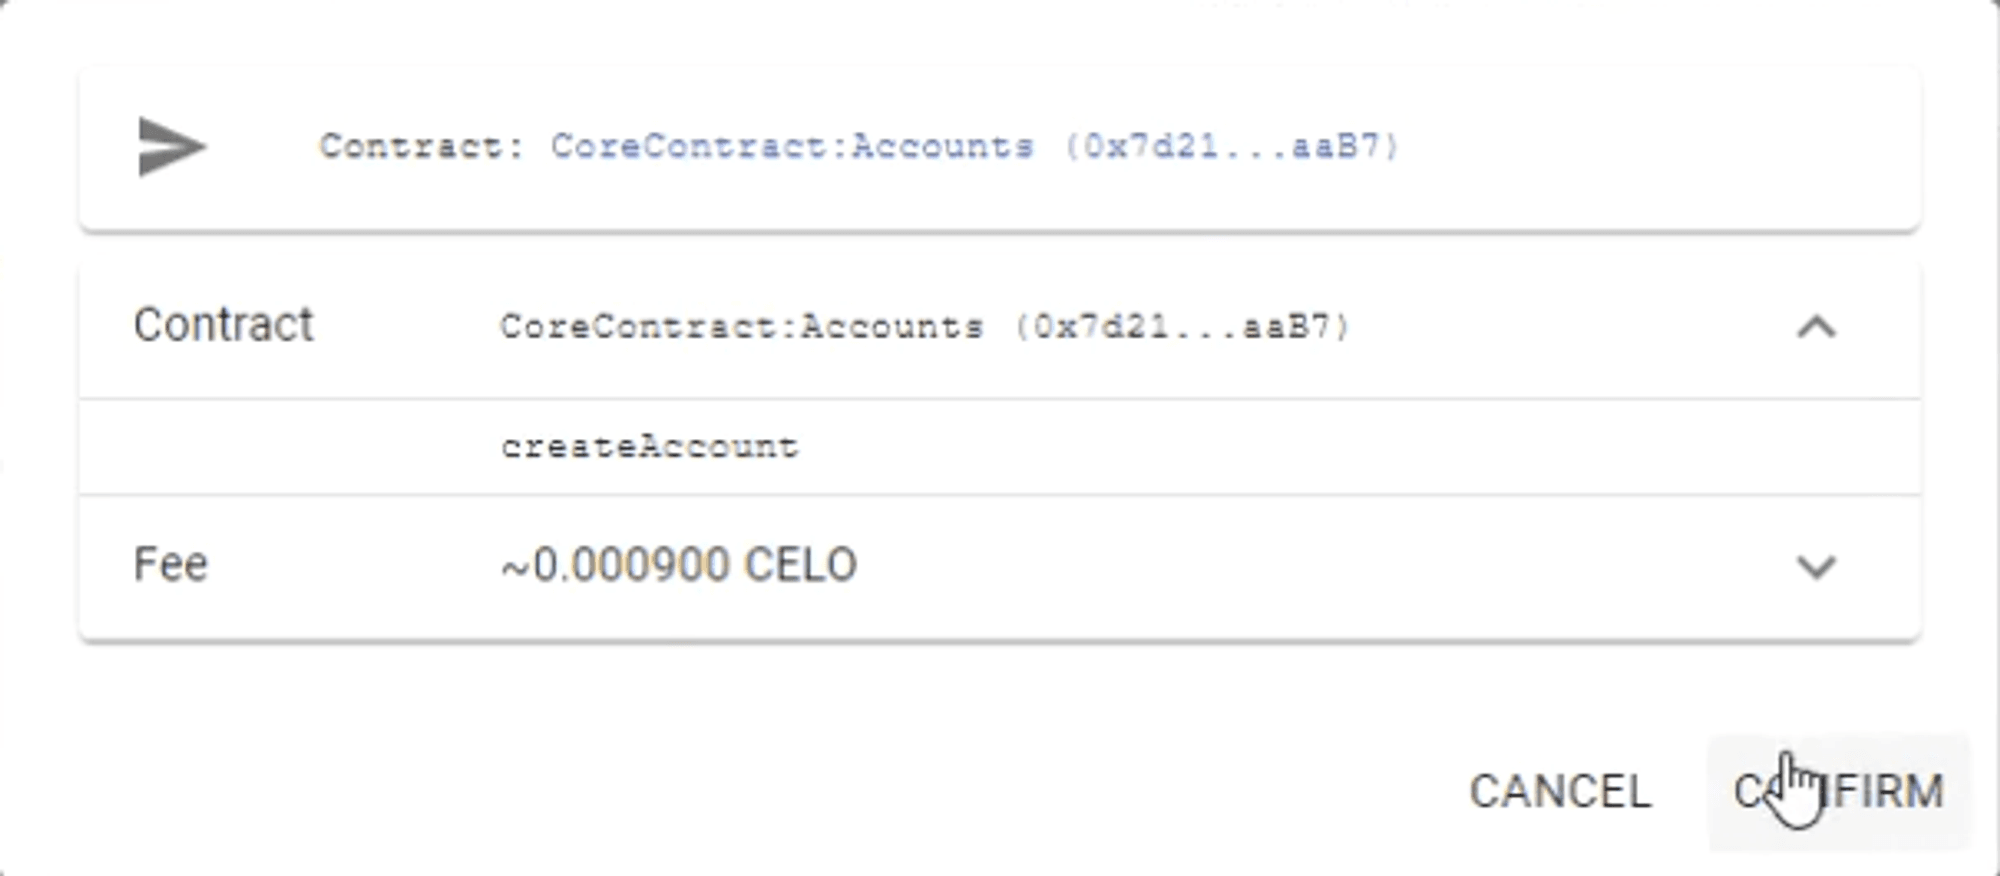
Create a Locker Account
Go to the Locker section and create an account by clicking Confirm.
You can lock and unlock your $CELO tokens. Since we want to participate in governance voting, we’ll lock 10 $CELO (or as much as you prefer).
Click Lock.
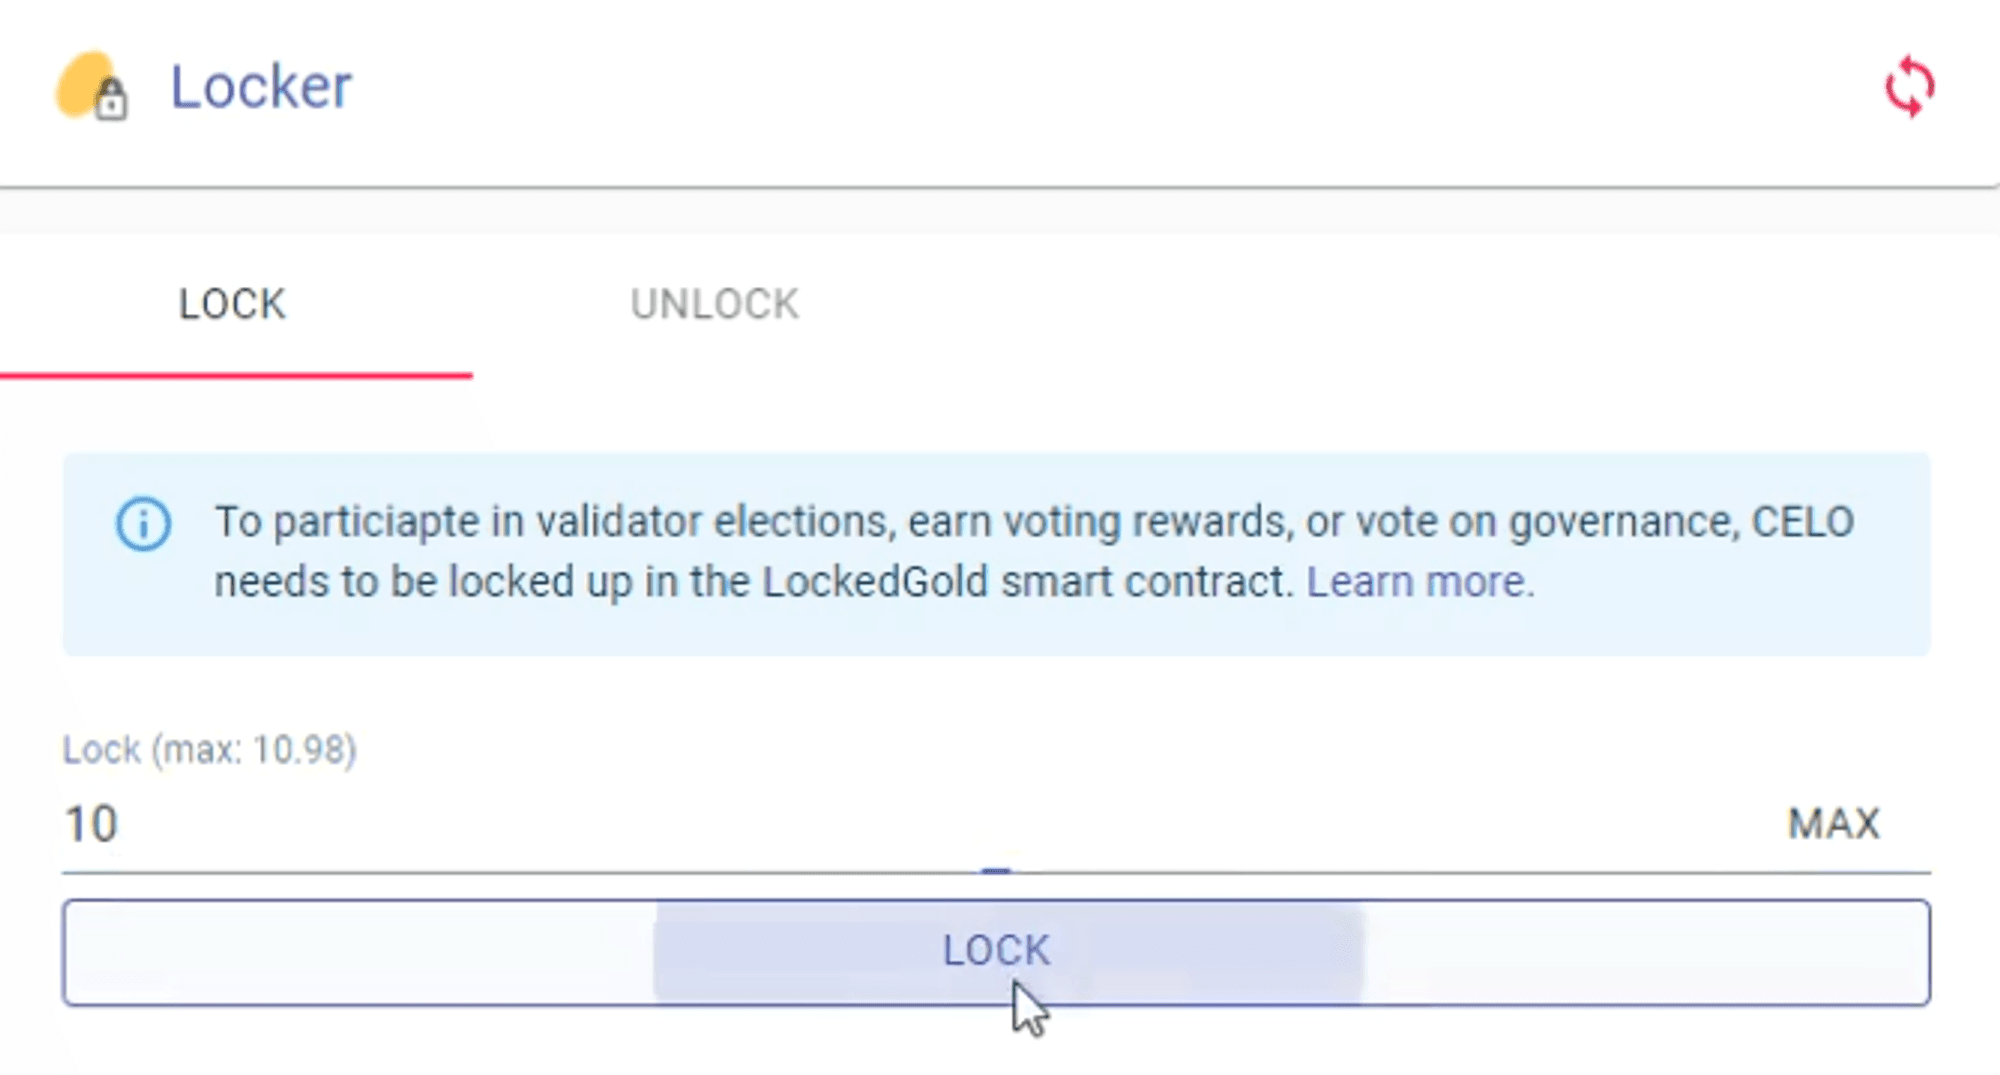
Click Confirm.
Step 5: Participating in Governance Voting
Now that we have 10 $CELO locked, go to the Governance section.
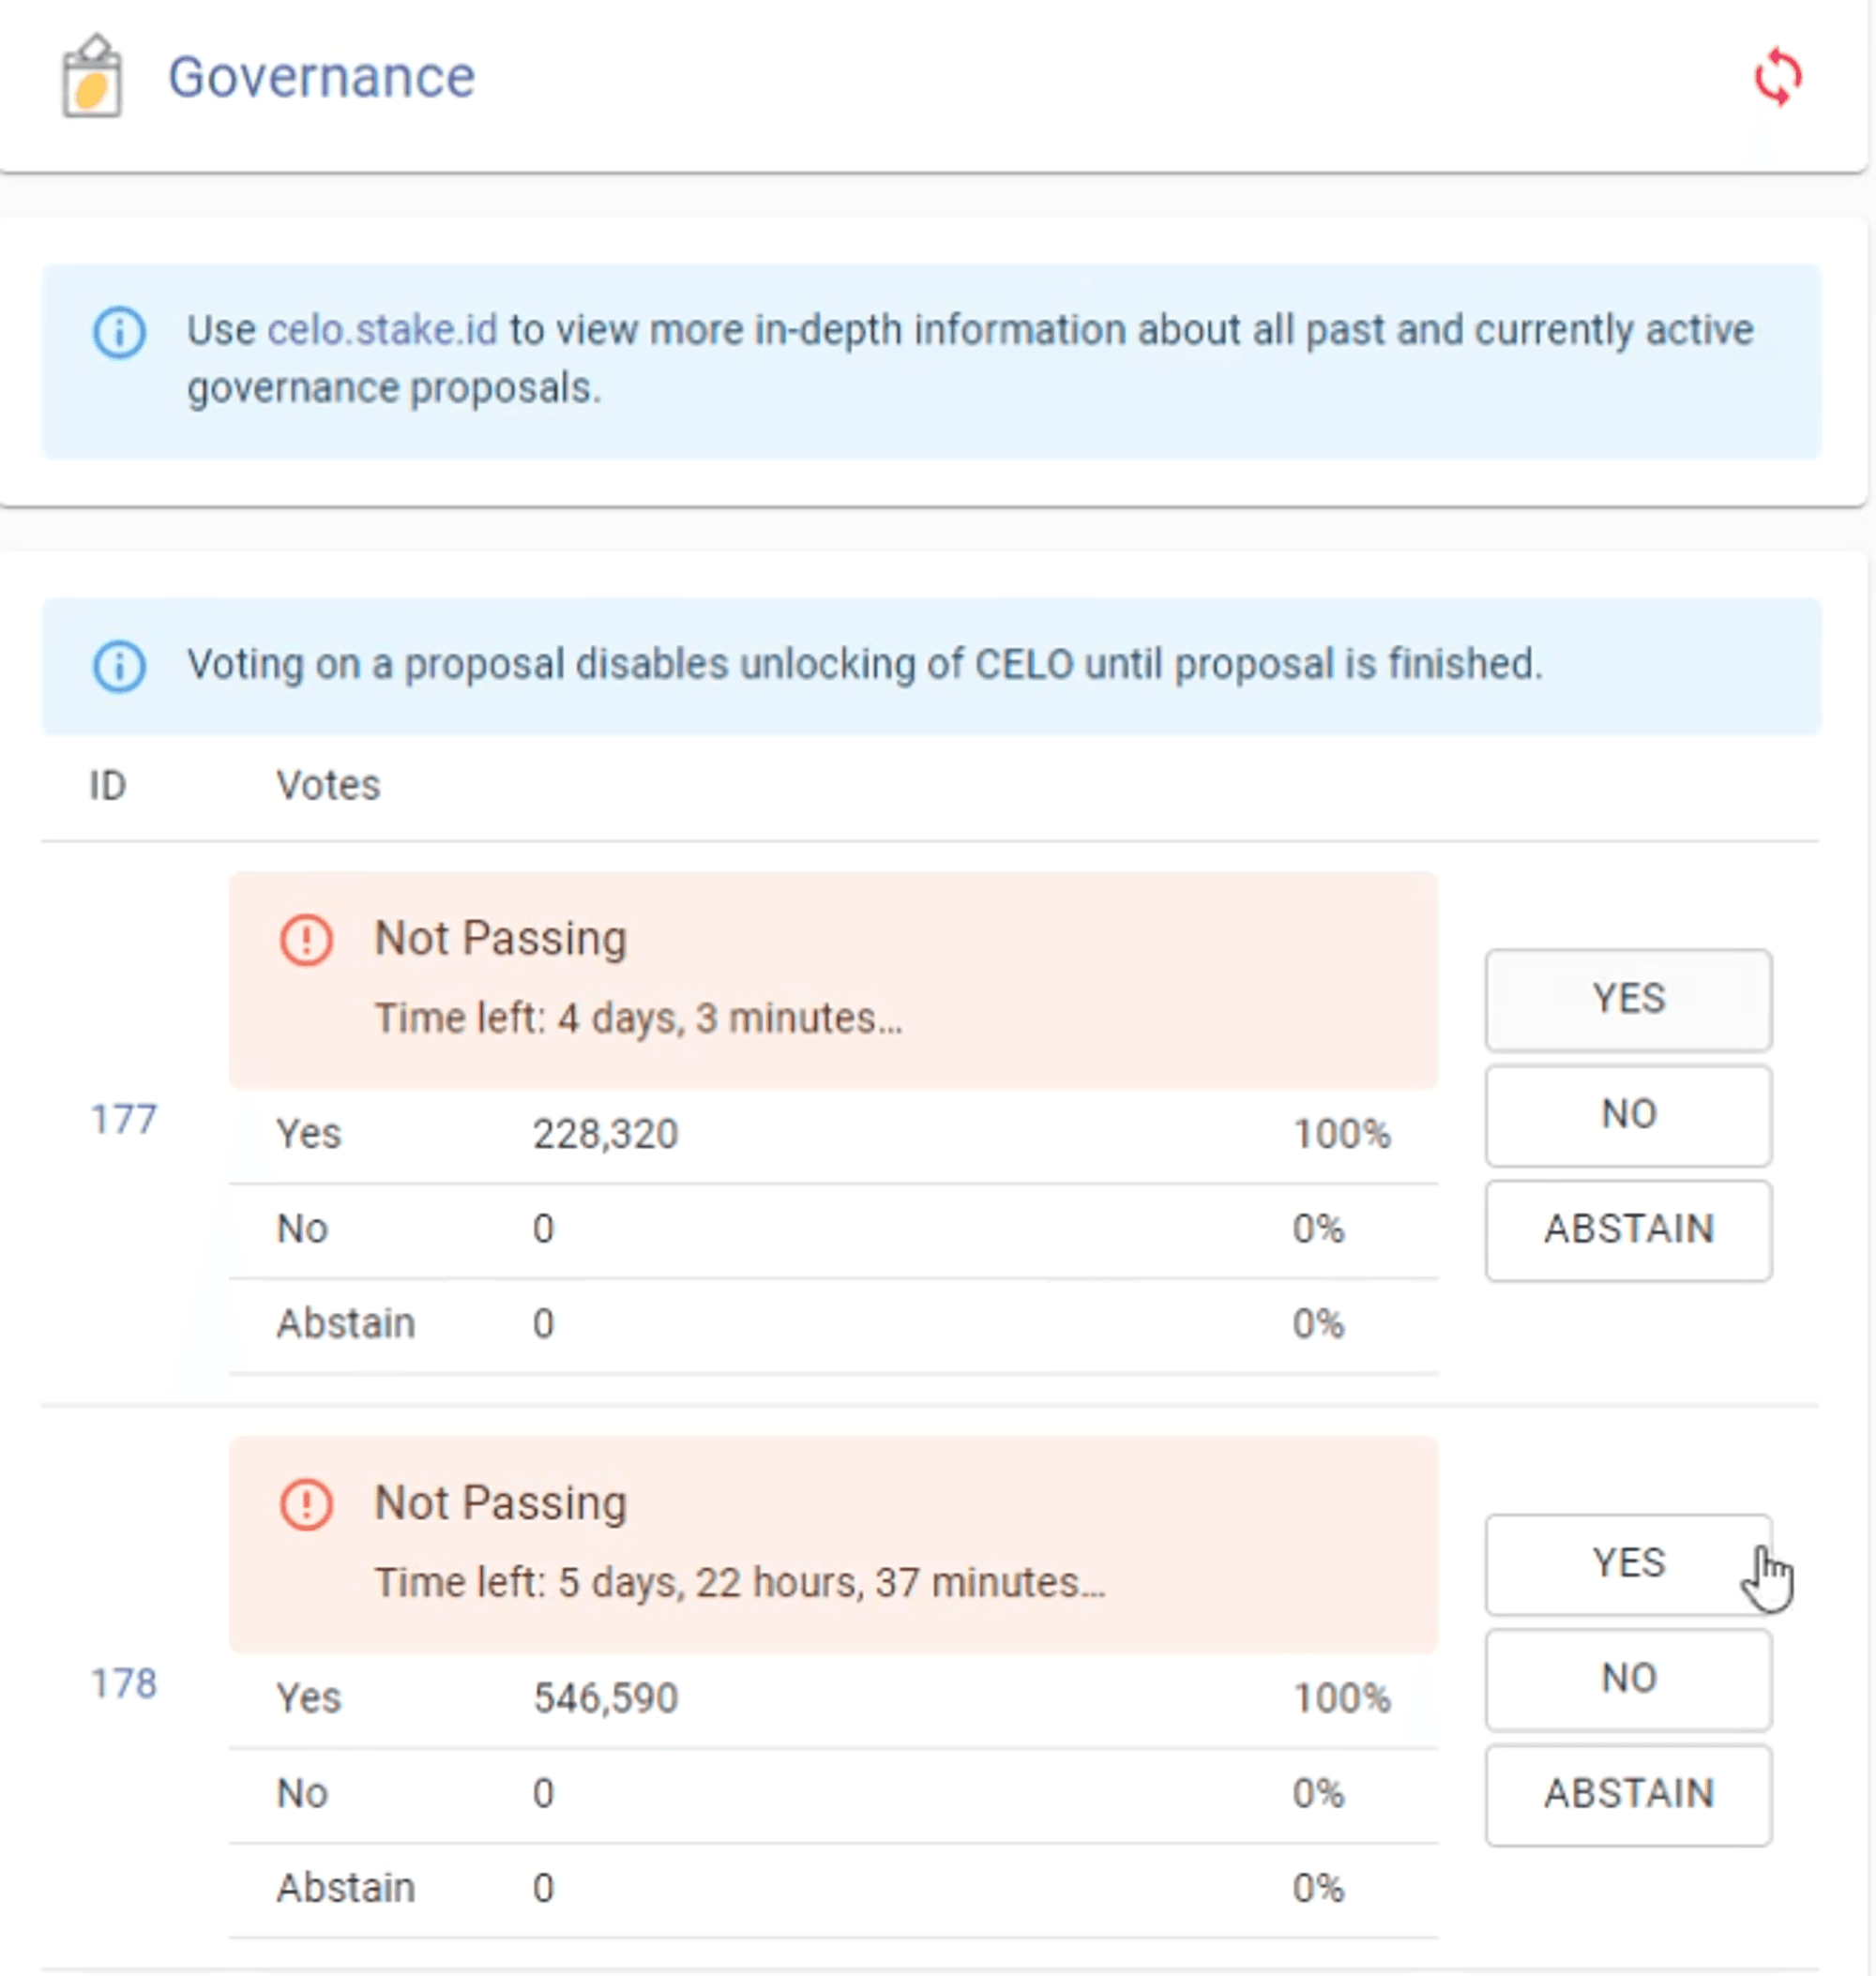
The buttons should now be interactive. You can vote "yes" for the proposals you support.
Conclusion
Et voilà ! That’s it! As easy as it gets, you are now ready to participate in governance voting using Celo Terminal. Thank you for following this tutorial. If you found it helpful, share it with your friends and happy voting, everyone!
Video tutorials can be found here.
Discover more
Transforming Lending in Emerging Markets: The Power of Local Stablecoins and the Microcredit Use Case
September 17 2024
by Markus Franke
How Emerging Markets Benefit From Local Currency Stablecoins: Insights from the Philippines
January 30 2025
by Markus Franke
Fonbnk and Mento Labs: Connecting Cash-Based Economies to DeFi with Mento Stablecoins
November 19 2024
by Behice Uzun
Sign up for
Mento Magazine
Want to know more about Mento?
Introducing Mento Magazine, featuring
news and updates on the Mento platform
and Mento Labs
